A USB backup form with drag & drop
|
|
|


Index
The Quest for a Simple Backup Method
Getting Started
Background & Code Sources for the Project
Explanation of Main Features
Backup Methodology
VFP Browser-based Backup Log
Slide-into-View Information Container
Fancy Font Logos on the Fly
Help Docs Written in MS Word, Saved in HTML
The Quest for a Simple Backup Method
Up to now, I have been using various freeware
backup solutions such as Cobian Gravity and SyncBack for my needs.
My requirements are not that rigorous: I am merely saving the files on
my laptop. Yet I longed for something
simpler than these full-blown packages.
So
when I read Tom Knauf’s Foxite post on his own backup method, I fell in love
with its simplicity. It calls for
putting daily backups on separate devices as shown here.
Now in my case, I also wanted to backup the files by time – only copy the files
that have been updated, so the method in this form does not use the archive
bit.
I
missed watching quite a few TV football games creating this puppy, but it was
fun. And forgive me for the dark Camelot
theme with Gustave Doré illustration, but losing your data is a rather grim
thought, so I think it’s in theme :- )
Getting
Started
Insert a USB flash drive in your system and
create a folder in it corresponding to today’s English day of the week such as “Wednesday”. The form will search all your disks and find
the first disk with a folder named “Wednesday”.
Next, if any Backup Items are shown in the Backup Project you want to use,
remove those because those folders are not only system. Now drag and drop (from Windows Explorer) a
few test folders. If you want to see
how the log handles Errors, include in your Backup Items the folder that
includes this form and you will get a few errors because active files will not
be copied.
Now
click the “Backup Now” button and click the “Backup Stop” to terminate at any
time waiting about 15 seconds for the backup operation to stop. Good luck.
Background
& Code Sources for the Project
As usual, Foxite was my starting point. I asked a question about ADIR and accessing
subfolders and got great help from Cetin Basoz, Mike
Gagnon, Jun Tangunan, and others.
The
recursive method from Borislav Borissov best suited
my needs, so that’s the one I adopted.
The OLE Drag and Drop methods from Windows Explorer and VFP controls I borrowed
directly from the OLE Samples in VFP9.
I could not get the drag the listbox-to-form drag drop to work, so to
remove items you drag to an image, the “royal” trash can.
Here’s
a screenshot of the form with balloons to show the major features:
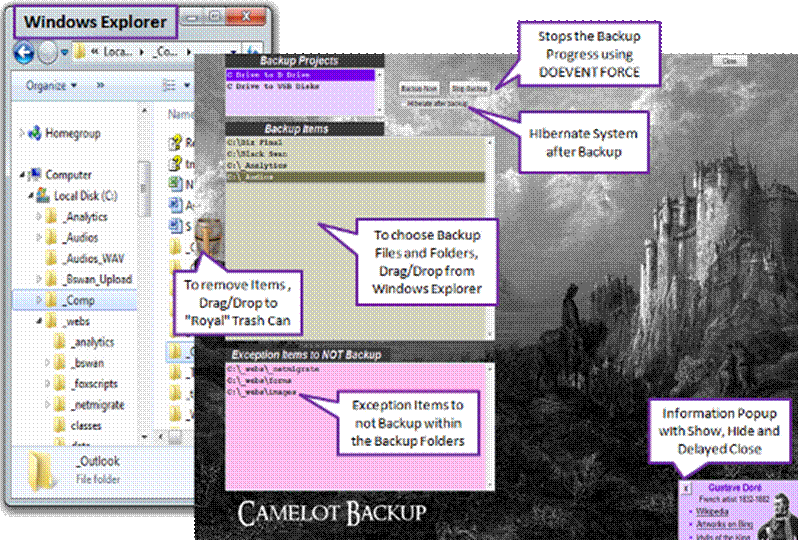
·
Windows Explorer is integral to this form and
it guarantees you will not make typo errors.
Drag and drop the files or folders into either the Backup Items or
Exception Items listboxes.
·
Backup Projects are defined as the "Backup
Items" minus any "Exception Items". For simplicity, the exception items are
checked for all Backup items even though they are relevant to only one backup
item. RightClick the Backup Projects and
you will be taken to a menu created from my GrimCat
helper class.
·
The Royal Trash Can is used
to drag and drop files/folders you want to remove from either the Backup Items
listbox or Exception Items listbox.
·
The BackUp Items listbox is where you drag the
files and folders you want to backup within a particular Backup Project. Move the items up or down to set the order of
backup. You can also multi-select the
folders you want to backup by selecting via Ctrl-Click. If no item is selected, all of the Items
will be backed up.
·
Exception Items are those files or folders
you do not want to backup within the Backup Items you chose. The listbox behaves the same as the Backup
Items listbox.
·
The Backup Now button starts
the backup for the particular Backup Project.
If no Backup Items are selected, then all Items are backed up. The method is looking for the first disk
drive on your system that contains the Day’s folder. For example, if today’s date is Thursday, it
will look for the first disk it finds that has a folder named Thursday in
it.
·
The Stop Backup button
allows you to interrupt backups. Using code
supplied by Tushar and Rick Hodgin,
the method checks to see whether the button has been pressed every 10 files
scanned. In most cases, you need to
wait less than 15 seconds for the backup to terminate, although if you are backing
up large files, it will take longer.
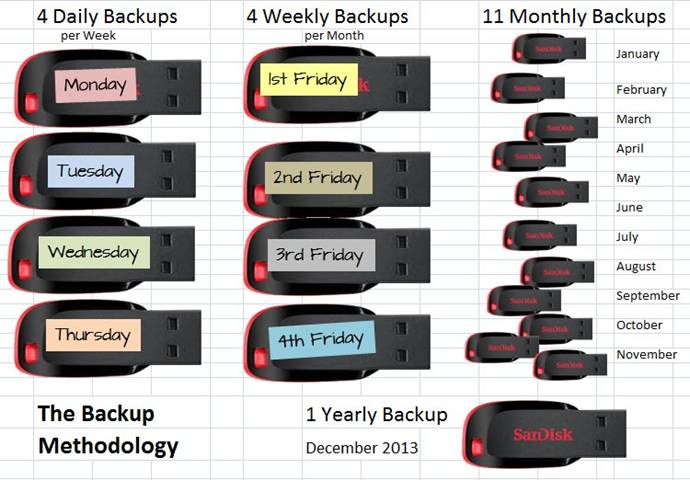
Tom
Knauf’s backup
methodology relies on multiple devices.
In my case, I am using USB Flash Drives. But you could, of course, use any kind of
device or backup on-line (though I have not supplied an FTP capability in this
demo).
The
time frames for each device in the plan are as follows:
Logging
of backup progress is done in a VFP browser control. Yes, going this way instead of using an
Editbox is a bit of overkill, but it has some advantages shown in the demo:
·
Color coding the log.
·
Hyperlinks to the source and target folders of the
backup.
·
Show/hide an Item’s backup errors by clicking the word
“errors” (javascript)
See the BeforeNavigate2 method of the browser control
to see how the hyperlink is intercepted to drive the ShellExecute
method to find folders. Stefan Wuebbe supplied the idea for folder access.
Slide-into-View
Information Container
In
the lower right hand corner of the screen is an Information Container below an
image of Gustave Doré, the famous French artist I used for the background illustration.
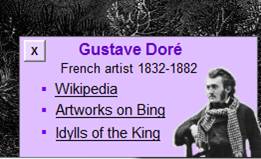 To see the Information Container, just MouseOver
Gustave’s image.
The container slides into view through a Timer control. To close, either Click
the close button or in 15 seconds it will close by itself.
To see the Information Container, just MouseOver
Gustave’s image.
The container slides into view through a Timer control. To close, either Click
the close button or in 15 seconds it will close by itself.
I
think some interesting educational forms can be made using this technique. And as we all know, coding such animations
is going to take a lot less time in VFP than it would using
HTML and javascripts.
The
“Camelot Backup” logo for this demo was created from a free font available at Dafont.com,
then the transparent PNG file was created using the
free imaging tool GIMP. At Dafont, rather
than download the font into Windows, you can just type in your fancy font
“Preview” text, then screen capture it.
Help Docs Written in MS Word, Saved in
HTML
This
Help file, coded in HTML, was written entirely in MS Word. To edit this file in MS Word, simply go to
Windows Explorer, RightClick the file, then choose “Open with Microsoft Office
Word”. A tutorial and full-blown example
form is contained in a demo called Cute Help and is
available for download at Foxite.
Use
of this Class
You are welcome to use this class
/ form any way you see fit. If you have
a suggested improvement to it, send it to me.
Or if you have created an upgraded version, it would be great to get a
copy, though it’s not necessary.
Dan Baker
Effort of the Poconos, PA dbaker@technology-research.com